

What is the DynFi Connection Agent?
The DynFi Connection Agent (DFConAg) is a plugin available for both pfSense®, OPNsense® and DynFi Firewall firewalls.
It works in conjunction with the connection agent backend found on the DynFi Manager.
The objectives of this package are as follows:
- Facilitate the addition of new equipment to the DynFi Manager.
- Allow connections to be established between the firewall and the manager.
- Limit the number of manipulations required by end-users to deploy their devices.
Screencast of the DynFi Connection Agent
How does the Connection Agent work?
The Connection Agent is a plugin that includes a graphical user interface to automatically drive the connection to DynFi Manager.
It uses the Auto SSH program. Autossh is a tool to ensure that an SSH session stays open at all times by testing it and restarting it if necessary. This allows our Connection Agent to keep a session open at all times with the DynFi Manager.
The source code for our plugin is available on GitHub, it integrates seamlessly with the pfSense®-CE and OPNsense® systems, and is natively included in our DynFi Firewall distribution.
What are the steps required to install and use this agent?
1. Installing the agent
On DynFi Firewall
The DynFi Firewall natively includes the login agent.
You can download and install the DynFi Firewall very easily.
On pfSense®
You can simply copy and paste the link below as root on your pfSense® devices. This will download and deploy the agent.
curl https://dynfi.com/files/connection-agent/pfsense/dfconag-latest-installer.sh --output /tmp/dfconag-installer.sh && sh /tmp/dfconag-installer.sh
Once the Agent is installed, you will have a new menu located in: Services » DynFi Connection Agent.
You are now able to use the connection agent, please refer to the section Add your first device.
Please note that the DFConAg Connection Agent is known to work with pfSense® v.2.4 and up and pfSsense-Plus v.22.05.
For OPNsense
curl https://dynfi.com/files/connection-agent/opnsense/dfconag-latest-installer.sh --output /tmp/dfconag-installer.sh && sh /tmp/dfconag-installer.sh
Please note that the DFConAg Connection Agent is known to work with OPNsense v.19.0 and up.
2. Deploy your first device
Enable the connection agent on the Dynfi manager
You need to ensure that your DynFi manager configuration file (located in /etc/dynfi.conf) contains the following lines:
connectionAgentPort=2222
This will enable the Connection Agent SSH service on the manager. Please ensure that the port you are using is unique and not used by any other service. Also make sure you allow incoming SSH connections from your remote devices (if DynFi Manager is protected by a firewall).
Restart DynFi Manager using :
systemctl restart dynfi
The DynFi Manager status of the Connection Agent is now Green and ready to go.
Generate your first token on DynFi Manager
Simply go to DynFi Manager » Connection Agent.
Go to Connection Agent » Tokens.
Specify the token validity period and other parameters and generate your token. Your token will appear in an overlay window, you can copy or download the token.
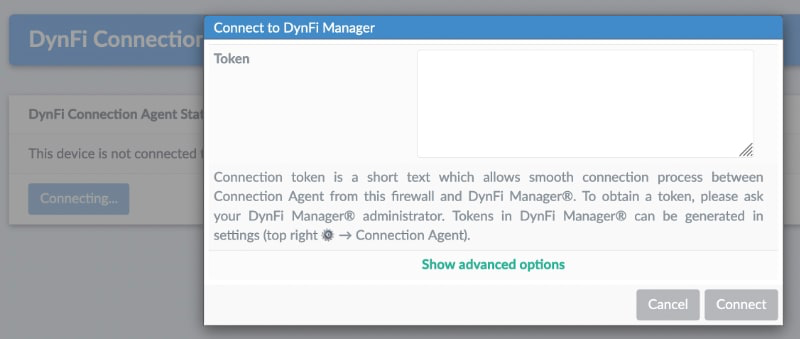
Deploy your first equipment
Paste the copied token into your equipment’s Connection Agent and confirm the action.
Let the Connection Agent generate a key pair between your Manager and your firewall device (preferred method) or use other SSH credentials.
Confirm and the agent will automatically connect to DynFi Manager.
3. Troubleshooting
Most of the time, the problem is port access issues. So make sure you have the appropriate firewall rules enabled, mainly on the manager side.
This is a common error that prevents firewalls from registering themselves.
DynFi Connection Agent Documentation
Access the DynFi Connection Agent documentation.
